

marius_florin
-
Număr conținut
497 -
Înregistrat
-
Ultima Vizită
Tip conținut
Profiluri
Forumuri
Calendar
Orice postat de marius_florin
- Anterioară
- 1
- 2
- 3
- 4
- 5
- 6
- 7
- 8
- 9
- 10
- Următoarea
- Pagina 5 din 11
-
oameni seriosi... nici pe aici nu intra ei
-
 detalii? sa l stapanesti sanatos.
 -
Bucuresti-dakar Un Om, O Moto, O Luna
topic a răspuns lui marius_florin în Marcosul Poze & Filme - Arhive 2005 - 2013
Felicitari pentru excursie! Ma gandesc sa fac si eu o tura pana in Maroc in luna mai. Chiar asa de rau s a comportat africanul? -
Accident Azi 02.04.2008 - Centura Bucuresti
topic a răspuns lui marius_florin în Prodigyul Accidente
Nu are nicio o treaba accidentul(despagubirea) cu o eventuala "mustrare" a soferului.Prima tine de contraventional iar a doua de penal. Vinovatia si raspunderea se stabilesc pentru fiecare caz in parte. Daca nu te poti stapani sa nu i o dai, si chiar o merita din plin, incearca sa nu i dai la fata Ideea e sa nu i lasi urme, ca altfel isi scoate certificat medico-legal si cu un martor iti poate face destule probleme. In general, pentru asemenea cazuri cand exista probe, se incepe urmarirea penala pt. lovire si, daca nu si retrage plangerea( pe bani desigur), risti sa ti iei o amenda administrativa sau chiar penala ( asta ramane la cazier un timp). Mai bine te lasi pagubas si l trimiti la stramosi decat sa pierzi bani si zile intregi pe la politie, parchet, instanta... -
Tura On Si Off Vrancea 5-6.04.08
topic a răspuns lui marius_florin în guy_anaul Evenimente, excursii
Traseul asta l am facut si eu toamna trecuta si pot spune ca este superb,cu conditia sa ai motor potrivit adica soft enduro sau enduro.Daca aveti sport veti merge linistiti de la Tisita pana la Soveja(asfalt impecabil), dupa aceasta portiune o sa inceapa "chinul". Portiunea Soveja-Lepsa este plina de cratere si unele portiuni s au surpat lasand maxim un metru juma de asfalt pe unde sa treci, in stinga fiind haul Daca vreti sa treceti in siguranta pe acolo, ar fi bine sa o faceti pe lumina, altfel o sa fie foarte "distractiv" Portiunea Lepsa-Ojdula este drum pietruit destul de bine intretinut (asa era in toamna), mai dificile fiind unele zone in care era namol. Doar daca ploua serios ar putea fi oarecare probleme pentru soft enduro cu pasager in dotare, in rest nici o problema pentru africana mea. Atentie pe portiunea de coborare sa nu va treziti cu "autobuzul" in fata cum va taie curba si va scoate in sant. Eu asa am patit o si m am tavalit datorita pietrisului de pe marginea drumului si abia daca am mangaiat frana fata. Prima poza este cu Soveja-Lepsa(pe inserate , urmatoarele cu Lepsa-Ojdula. ps Poate o sa va ajung din urma duminica la Lepsa si sa facem restul traseului impreuna. Cam pe la ce ora vreti sa plecati din Lepsa??


-
Stie cineva daca lista cu participanti mai poate suferi modificari?Desi e cam tarziu... Din cate se pare nu va fi prezenta Honda
-
Vizite De Week-end (8-9 Martie 2008)
topic a răspuns lui marius_florin în boieru'ul Poze & Filme - Arhive 2005 - 2013
Salutare! Foarte frumoase pozele! Eu mi am cumparat de curand un Canon S5IS ,da nu prea am avut ocazia sa l folosesc si nici nu prea ma pricep. Referitor la trasee, am si eu o propunere Nehoiu-Neruja-Valea Sarii-Lepsa-Targu Secuiesc Am incercat vara trecuta sa l fac, dar nu am reusit fiindca localnicii din Gura Teghii mi au zis ca " nu se poate trece cu motocicleta peste munte" As fi mers mai departe, dar aveam pretena in spate asa ca....am luat-o pe asfalt. Pina la urma am reusit sa fac ultima parte, adica Lepsa-Targu Secuiesc. Superba zona!! Iar drumul, perfect pentru vacile noastre!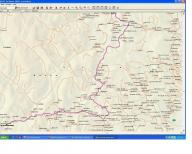
-
Honda AfricaTwin - XRV650/750
topic a răspuns lui marius_florin în Axa cu Scameul Totul despre motocicletele de enduro touring & adventure
Pe langa clasicele probleme la pompa de benzina si regulatorul de tensiune am aflat ca o alta problema la africana ar fi pinionul si "output shaft"(cum se traduce in romana?). Parerile sunt impartite, unii zic ca pinioanele after-market ar duce la uzura prematura a "output shaft", altii spun ca de vina ar fi tensionarea lantului-acesta ar trebui lasat mai slabit. Mai multe detalii la : http://www.xrv.org.uk/forums/search.php?se...p=25&page=3 "I've never used Honda front sprockets and never had a problem. The MAIN cause of output failure (and this applies to other bikes with long travel suspension) is over tightening of the chain. It's remarkable how many Honda mechanics make this mistake. On the odd occasion I've handed mine over I've been shocked by how often it comes back with less than 30-40 mm of play. This puts massive strain on the bearings and seals when the suspension compresses over bumps. In short, if you're worried, buy OEM - but make sure your chain is not too tight. On these bikes slightly too loose is better than too tight...." Ce configuratie pinion/foaie aveti la africane? -
Honda AfricaTwin - XRV650/750
topic a răspuns lui marius_florin în Axa cu Scameul Totul despre motocicletele de enduro touring & adventure
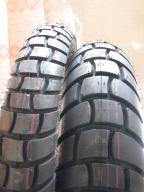
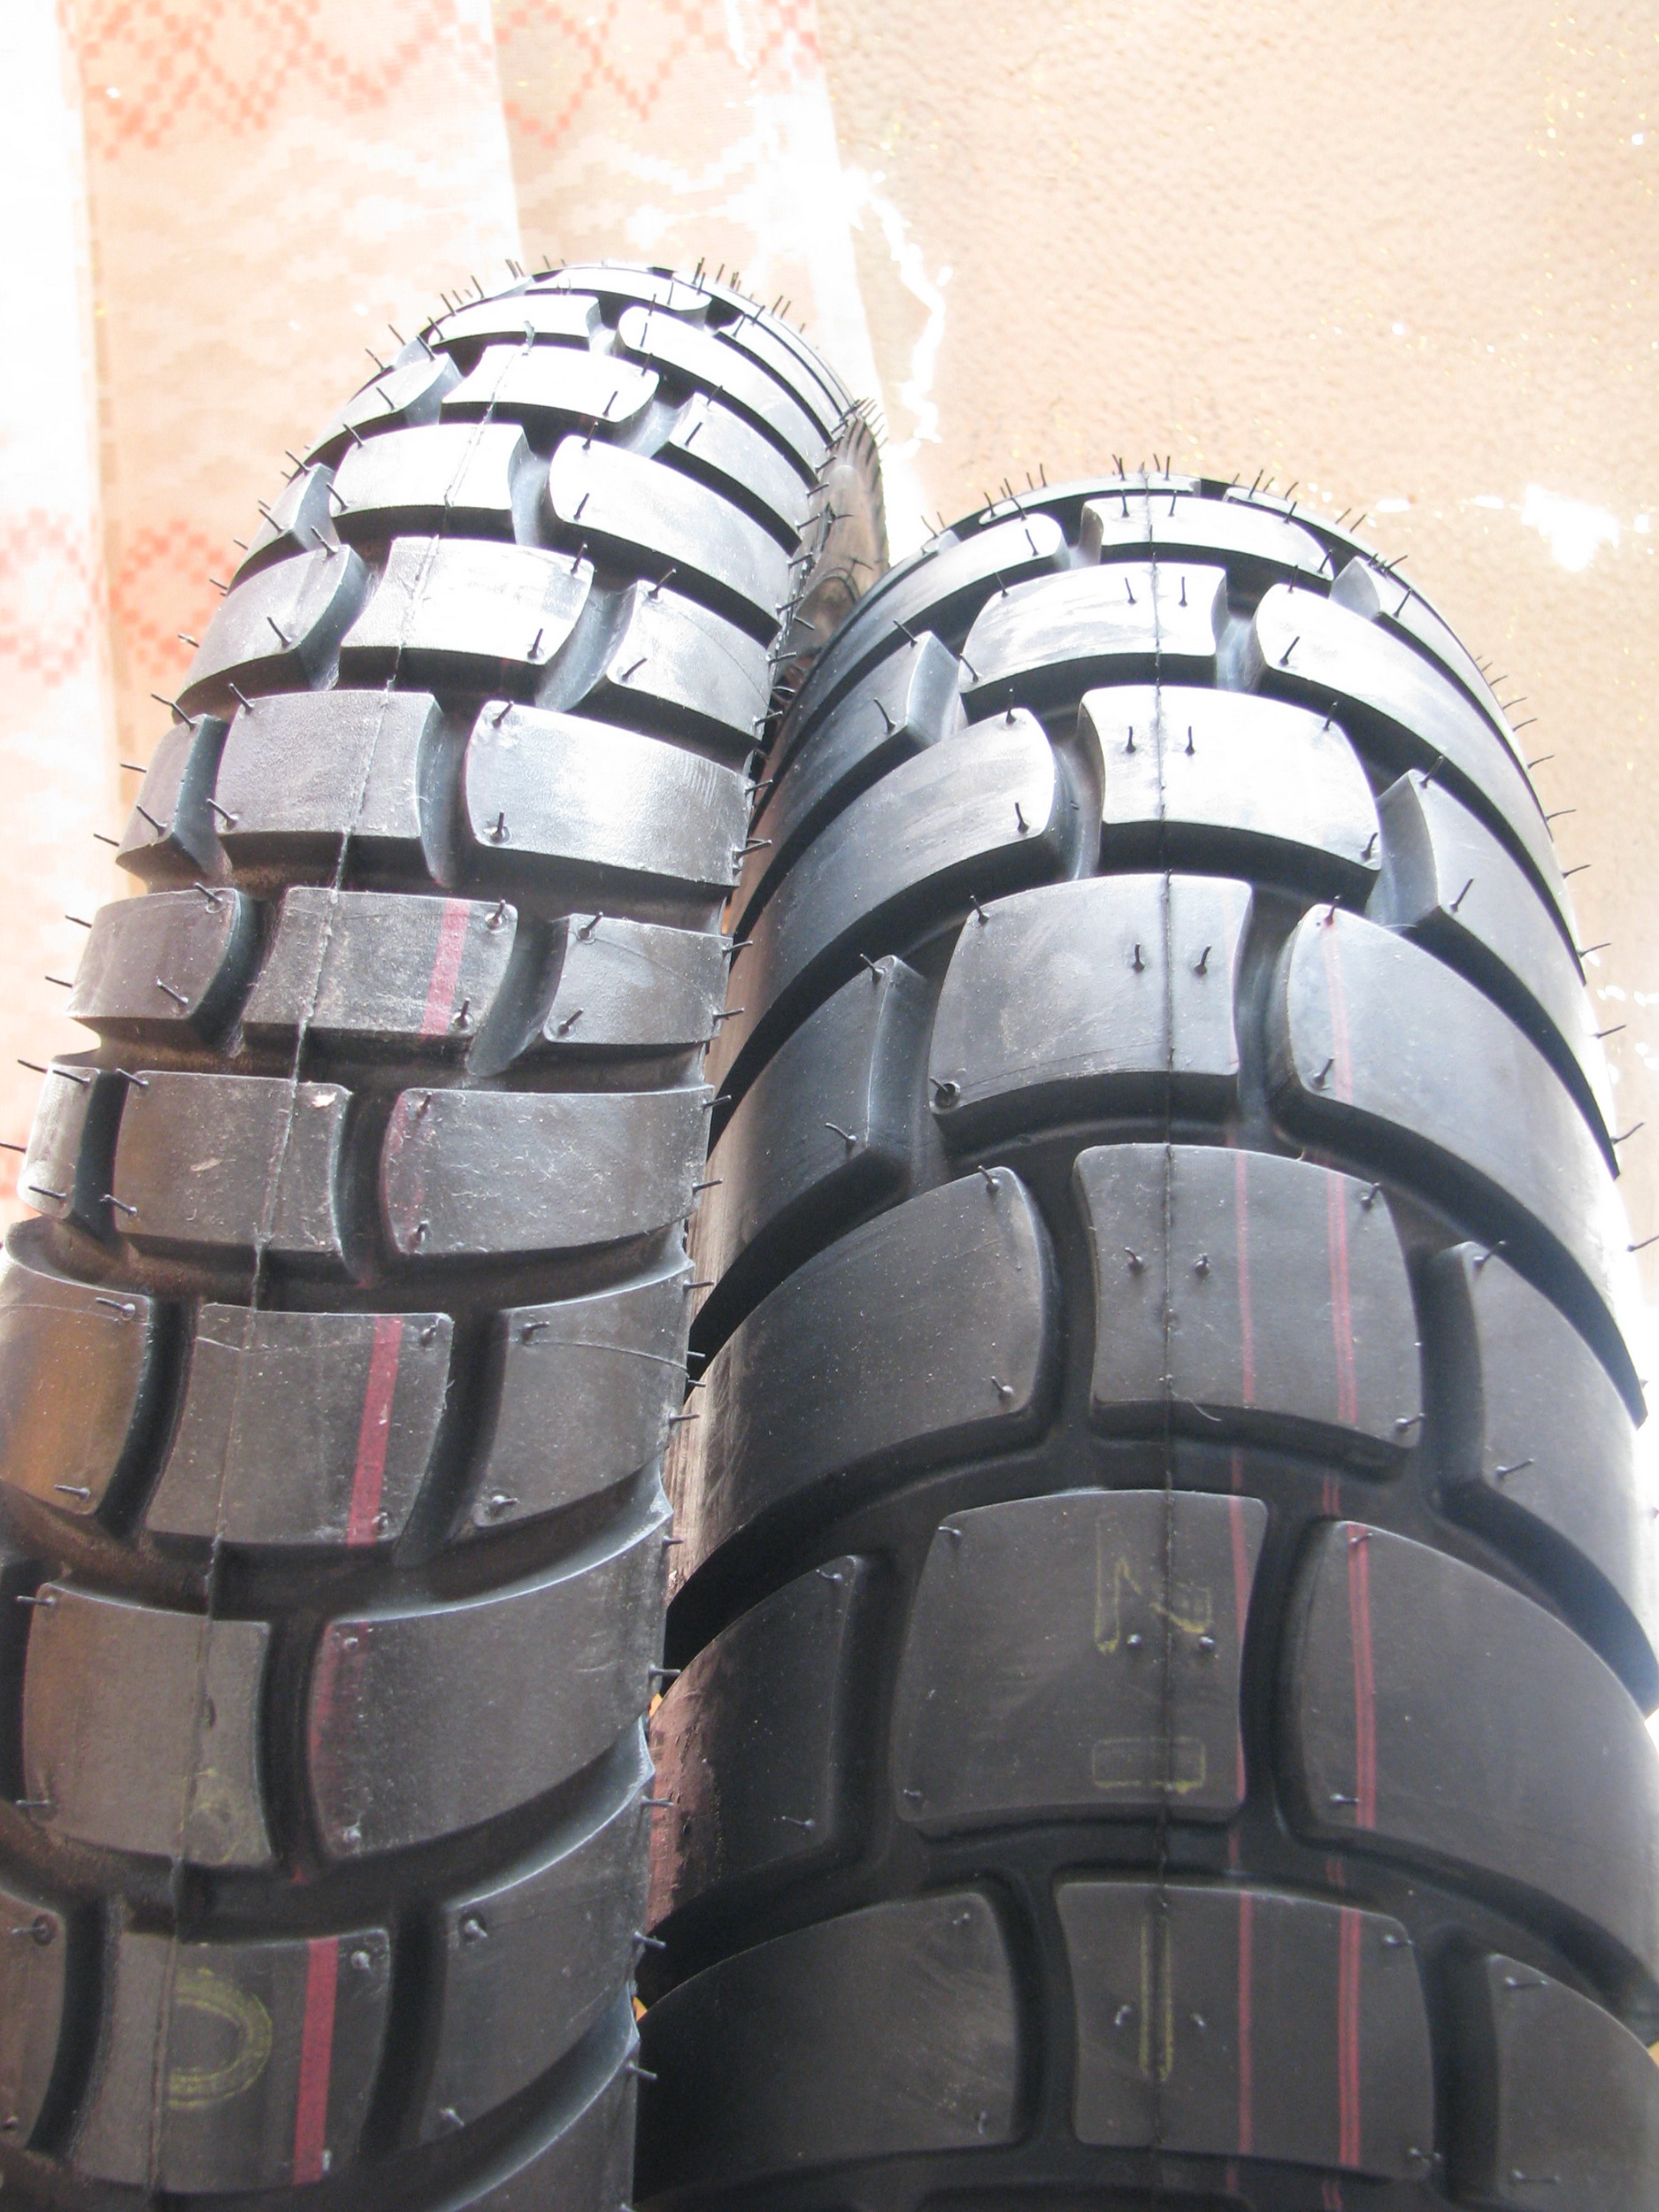
Eu astazi am cumparat un set de Continental Escape la 150euro. In review urile pe care le am citit se zicea numai de bine despre ele. Si la 150euro mi se pare ca au cel mai bun raport pret/calitate. Alte impresii dupa ce le testez. http://www.conti-online.com/generator/www/.../escape_en.html --- Mesaj completat în 03 Feb 2008 19:14 ------------- atasez doua poze cu profilul gumelor ContiEscape: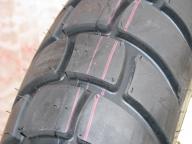
-
Tura In Cheile Bicazului 26.01.2007
topic a răspuns lui marius_florin în aditorpanul Poze & Filme - Arhive 2005 - 2013
Felicitari pentru tura! Ce temperaturi au fost? Poti sa mi descrii "sistemul de prindere" al camerei video? Eventual sa pui si niste filmulete... -
superba!!!! ai facut ceva modificari la ea. mai stii posesori in tara? cum vine primavara poate fac o tura pana la braila sa o admir si eu. cu acordul tau,desigur.
-
M as baga si eu cu africana cu o singura conditie, sa ne intoarcem pe lumina. @Vulturul argintiu: Unde stai ,mai exact, in Salajan? Eu stau in spatele pietii Titan.
-
Honda AfricaTwin - XRV650/750
topic a răspuns lui marius_florin în Axa cu Scameul Totul despre motocicletele de enduro touring & adventure
Ce pot face unii cu o africana africa twin africa -
Ultima Iesire Pe 2007, Siriu 25.11.2007
topic a răspuns lui marius_florin în rmoarcasul Poze & Filme - Arhive 2005 - 2013
Ce frumos e sa vezi atatea africane intr-un singur loc. Ar trebui sa facem si noi o intalnire la primavara, ca sa fim in rand cu lumea de pe afara. -
..tu vorbesti despre tine? ... eu m-as apuca de etichetat dupa ce mi-am luat macar carnetul...si nici atunci bafta totusi...la implinirea visului tau
-
stii care i problema...ca uneori sunt si domnisoare care se preteaza la gesturi de acest gen...cu privire la baieti...presupun ca asta inseamna democratie
-
Confectionare Imbracaminte
topic a răspuns lui marius_florin în marius_florinul Service si intretinere curenta
Nu pre vad unde s aberatiile dar...nu conteaza. Oricate echipamente termice de la Revit ti ai cumpara(si credeme ca m am informat pe tema asta), tot o sa ti fie frig in iesirile mai lungi in afara la temperaturi apropiate de 0 grade, vorbesc de maini si picioare. Asa ca singura solutie e echipamentul electric. Stiu o gramada de firme care produc asa ceva, insa sunt destul de scumpe si aveam nevoie de o solutie mai economica asa ca.... multumesc de sfaturi Nu vad care i problema ta cu astfel de echipamente cat timp consumul poate fi suportat de electrica motorului... --- Mesaj completat în 15 Nov 2007 16:49 ------------- Manusi poti confectiona? La manerele incalzite am inteles ca iti este frig la partea exterioara a manii. -
Confectionare Imbracaminte
topic a răspuns lui marius_florin în marius_florinul Service si intretinere curenta
Pentru mine chiar e o problema de tehnica. Eu as vrea niste manusi incalzite. Crezi ca ai putea face asa ceva? -
Stiu ca nu tocmai aici ar fi locul topicului dar... aici sunt mesterii. Am gasit pe net un "ghid" pentru confectionarea echipamentului moto incalzit electric si va cer parerea.(eu la capitolul electrica sunt varza ). Credeti vreunul ca puteti face asa ceva, presupunand ca aveti toate materialele ?? Chiar sunt interesat sa testez o astfel de "creatie". Asta este ghidul in engleza : http://www.shadowriders.org/faq/electricvests.html Sue's recipe for Electric Motorcycle Clothing Back in 1994, someone gave me a copy of an article that described how to make an electric vest. There was only one clue as to the article's origin and that was the author credit: Mark Rotman, GWRRA #33440. So I'm guessing it was from some GoldWing riders' newsletter. I used the article to create an electric vest (which 3 years later I'm still wearing) and now I'd like to offer my own electric clothing 'recipe' for others to use. Rest assured, you don't need an engineering or electrical background to accomplish this project. (I'm writing this with a person like me in min& very basic stuff!) You need to know an approximate amount of current available on your motorcycle. In many owner's manuals, you can find the number of amps that your bike produces and factor in how much is left over after supplying juice for various functions. Be careful not to overload the system. I was stranded in downtown Chicago on a subzero night because I had used the vest and was experimenting with heated glove inserts and the bike wouldn't start when I left work. The combination proved to draw too much from the alternator. Not good. I'm only going to give guidelines here. The specifics, like whether to make a vest or jacket or gloves, or how much heat you want, are left up to you. Stuff that you need: • wire: 30 gauge, multistranded, teflon coated copper, usually comes in a 100' spool, Order form any electronics supplier. I ordered from Newark Electronics who have locations everywhere. In Schaumburg IL, call (84 7) 310-8980. Their product was called "hook-up wire, "part 36F61OWA. Price in 9197 was $14.20 • wire or lampcord: any 16-18 gauge, insulated wire, like a lamp cord; this wire runs from the vest to the battery so the length is up to you to figure out • fuse holder: I used an inline holder • fuse: number of amps depends on how much juice your vest will draw; my vest was only 4-5 amps so I use a 5 amp fuse • switch: this is optional; I put one on my vest so I could turn it on and off as I ride without having to unplug it from the battery • connectors: you choose! I used crimp barrel connectors to successfully connect the very fine 30 gauge wire to the 16 gauge cord. Not easy! Experiment and let me know what worked for you. • tongue lugs: or something to easily affix the wire to the battery post • some kind of plug/socket or cigarette lighter combination: to securely connect (but to allow for quick disconnect should you walk away from your bike and forget to unplug!) the wires from the battery to the wires on the vest • Stitch Wichery stuff: purchase this from any fabric store; it creates a bond between 2 pieces of fabric when ironed • The item of clothing and some cloth: read on... Step-by-step 1. What do you want to electrify? I used the quilted vest that snapped into my Hein Gericke jacket. You could also use any jacket that's light enough to wear under your leathers or riding suit. I just finished electrifying the thermal liner that velcros into my First Gear Expedition suit pants. The principle here is that you're going to make something similar to an electric blanket. You'll be sandwiching the wires between your vest or whatever and another piece of material. Another option is to thread the 30 gauge wire on a quilting needle (which has a large enough eye) and sew the wire right into the fabric of your vest. That would only work if the vest was quilted. I opted to do this with my pants and it worked just fine. Make sure the wires are not against your clothes or skin; they get hot and could bum. Don't ask how I know that. 2. How much heat, how many amps, how many watts??? Two physics equations help us here: Voltage = Ohms (resistance) x current (amps) Watts = voltage x current (amps) We know the voltage .... most motorcycles have 12 volt batteries. The 30 gauge wire is 1 ohm per foot of wire. So. 30 feet of wire equals 3 ohms. So, based on the first equation, we now know that 30 feet of our wire draws 4 amps of current. Based on the second equation, we also know that the watts produced by our electric vest will be approximately 48. From here you can figure out how much wire to use to meet your heat needs and not draw too much from your m/c. On the pants I made, I used 20 feet of wire which means it draws 6 amps from the bike and produces 72 watts. And it's plenty hot, maybe even too hot. Assembly Our mission is to create a loop of electricity that runs from the motorcycle battery to the electric clothing. Keep that in mind as you read through the assembly steps. I put a loop off the battery (a wire from the positive post with the inline fuse holder and a wire from the negative post and joined them into a plug that hangs from the battery all the time). This could be a cigarette lighter type thing; that's what I used on my first attempt. When I get on the bike, hanging off the bottom right side of my vest is a socket that mates with the plug hanging off the battery. A very kind friend sent me some cool plugs and sockets on pigtails so I didn't have to shop for those. They should be readily available from any Radio Shack or other similar electronics store. I also put the switch on the wire coming off the vest. The hardest part of the process is affixing the wires to the vest. Thirty feet of very fine wire is tough to work with. The object is to lay the wire so that there's equal heat distribution. Run it up and down the front of the vest, each side, and then up and down the back, and back around to meet the other end of the wire in front. See diagram. But how do you lay the wire down, put the stich witchery on top and then cover with the fabric? It's tricky. The original author recommended cutting the wire to the right length and then working one section at a time. Put the wire in place on your vest, front right side, use scotch tape to keep the wire in place. Put the stichwitchery on that section over the wires, put the other fabric in place and iron according to the instructions on the stitchwichery package. Repeat for the back and then for the front left side. This is the hardest part! Be patient and take your time. Doing this part correctly the first time will save a lot of time and energy. When you've got the wires sandwiched between the vest and the fabric, I'd recommend stitching around the edges so the wires aren't tempted to wiggle out (like mine did). Again, instead of the stitchwichery route, you might try sewing the wire into a quilted vest, like I did with the thermal liners in my pants. Ok, the next task is to take those two little teeny-weeny wires that are coming off your vest and connect them as permanently as you possibly can to the lamp cord or whatever larger gauge wire you're going to use. This was my weak point and a repair I made over and over because I kept ripping the wires out. My most successful method (still unbroken after a whole year) was to use barrel crimp connectors. Peel back the insulation on the 2 wires (one 30 and one 16 gauge), hold them parallel to each other, carefully braid the strands of the 30 gauge with the strands of the 16 gauge, put the crimp connector over them and crimp as hard as you can. Then top off the connection with lots of electrical tape. Do the same with the other 2 wires and tape the 2 connections together and tuck them safely inside the vest. You might want to allow a loop as strain relief inside the vest (so when the wire gets accidently pulled hard, there'll be some slack to give before it breaks). Here's where you can add a switch if you desire. Install it on the 16 gauge cord. Then connect the cord to the socket or whatever you choose to use (that will attach to the plug hanging off the battery.) If you ride a BMW that has an accessory socket on the bike, just buy the male plug to connect to the vest. Easy! And then you don't need the fuse. That's about it. Please email me if you have questions. Mark Rotman, if you happen to land on this page, please contact me so I can give you my deepest thanks and ask you how to better cite the article you wrote.
-
Duminica 11.11.2007
topic a răspuns lui marius_florin în bubucatyul Poze & Filme - Arhive 2005 - 2013
Aproximativ asta a fost traseul : Vitezele cu care s-a parcurs variind intre 0-240km/h. Atentie mare ca de la 200km/h in sus rucsacele se deschid automat si.... Cred ca e valabil doar pentru buse... Mie mi-a facut placere si mai astept si alte ocazii. p.s E adevarata treaba cu bubucaty si viteza Saru-mana !
-
O imagine de "sus" a cheilor: http://maps.google.com/?ie=UTF8&t=h&am...005021&z=18 Sper sa ajung si eu cu africana mea. Nu am mai plecat niciodata la plimbare la 8 , dar ....incercam.
-
Salutare! Dupa o discutie avuta cu @ lotru despre hibele vtr-ului , am frunzarit doua siteuri unde se discuta despre aceste mobre ( http://www.vtr1000.org/phpBB2/index.php si http://www.vtritalia.it/vtr_forums.html ) de unde am aflat ca exista o problema cu o piesa care se numeste in engleza cam chain tensioner si care ,daca se strica. iti cam distruge motorul( reparatiile s-ar ridica undeva la peste 1000euro ) Piesa noua costa in jur de 50$ in usa .Daca e cineva interesat,astept un semn si poate iesim mai ieftin cu costurile de expediere. -intinzatorul manual(after market): http://www.cbrzone.com/sprockets.html http://secure.mycart.net/catalogs/catalog....;showprevnext=1 -intinzatorul original: http://www.davidsilverspares.co.uk/cgi-bin...ain%20tensioner Aici aveti linkul cu problema rezolvata prin inlocuirea intinzatorului cu unul original sau cu unul after-market manual care cica ar fi cel mai sigur( cel original dupa un anumit numar de kilometri se strica ). http://www.vtr1000.org/phpBB2/viewtopic.php?t=8326 http://www.vtr1000.org/phpBB2/viewtopic.php?t=9676 Cam asa trebuie sa sune un intinzator dus : http://www.youtube.com/watch?v=_M0uz-HG6jw P.S sunt varza la capitolul mecanica asa ca va las pe voi sa explicati care i buba
-
Varianta Siriu este cea mai faina,parerea mea. Sinaia prin Targoviste am facut o sambata trecuta si nu se poate compara cu Siriu,drumul este destul de prost intretinut.(valabil pt.motociclete sport-touring).
-
Felicitari ! Cat ati facut si cum a fost drumul??
-
Ktm 690 Enduro 2008
topic a răspuns lui marius_florin în Enduristulul Discutii generale enduro si motocross
Sunt tare curios cat costa Rally Replica...


- Anterioară
- 1
- 2
- 3
- 4
- 5
- 6
- 7
- 8
- 9
- 10
- Următoarea
- Pagina 5 din 11